Yes, today is Halloween and we are going to be helping out at church for the Fall Fest, it is an annual tradition we began when we moved to Washington. Our daughter was already too old to go trick or treating, so we joined in at the fun at church. Hundreds of children and their families come to the church to enjoy a good time, out of the weather. The children and some parents come in costume, and we have inflatables, and carnival type games for everyone, Oh we also have CANDY!
I do not have many 'holiday' stamps, I have a few Christmas sets, but no Halloween and I don't really send Halloween cards. I like to purchase stamps that are more universal, that an be used over and over and over again.
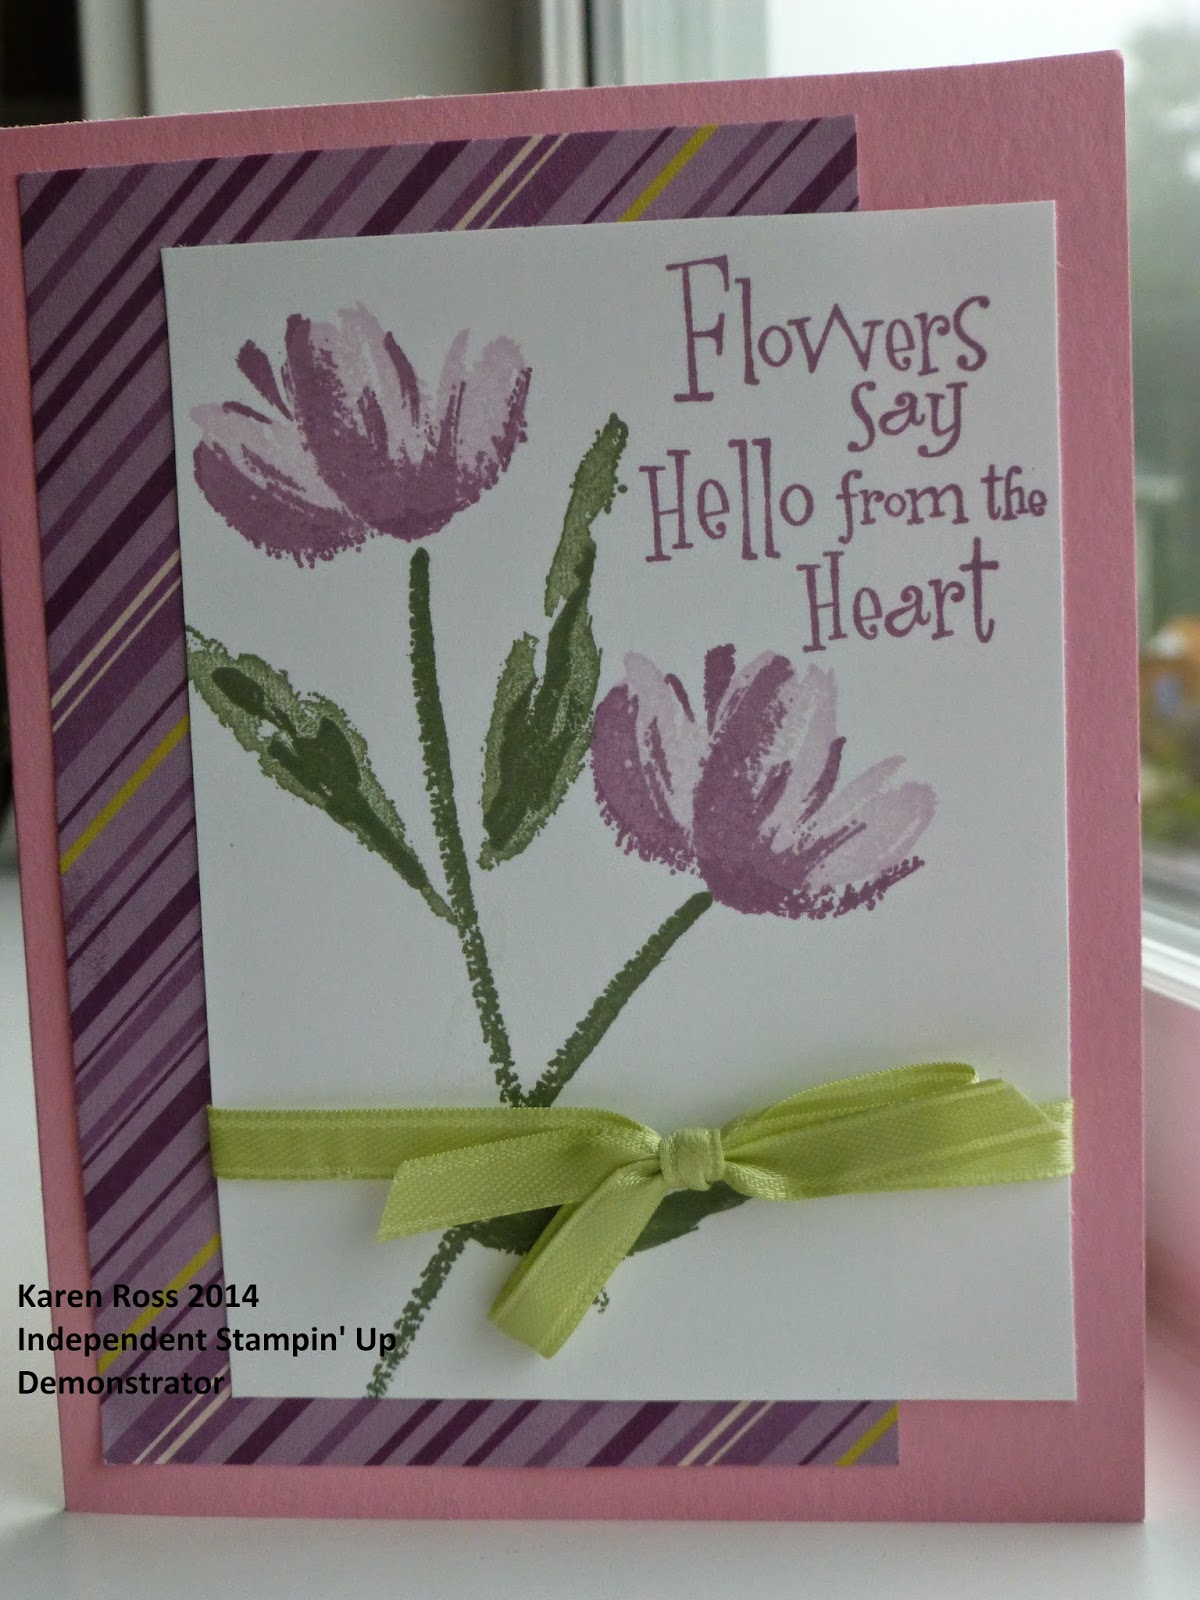
Here is another card I put together for our swap last month. I had stamped the background and tied the ribbon around it, then set it aside. So I came and added the flower and leaves. Leaves are from the Flower Patch set (134207) and I used the matching Flower Flair Framelets (133731) I like using eyelets, so maybe I added a few too many? Who is to say it is too many?
I stamped the flower 3 times then punched it out with the large scallop punch 2 3/8 " (118874) then the 1 3/4" scallop punch (119854) then on the third one I used the 3/4" circle punch (119873) I used Stampin' Dimensionals (104430) for a nice finish. The yellow flower is one of the framelits from Floral Frames Collection (127012)
Thanks for stopping by today. I hope you have a fun and safe Halloween!
Friday, October 31, 2014
Wednesday, October 29, 2014
More swap cards
These cards are more of the cards that I swapped at Bobbie's workshop last month. Time was running out and I had not had an opportunity to make any swap cards, so I went to my desk and found 'pieces and parts' and went from there.
On this card I used my Simply scored scoring tool (122334) to make lines top and bottom, just subtle lines. Then I used small punches, to punch out the corners of the square scalloped punch (retired punch) then layered them over a black cards stock strip, then I added bakers twine. I used a square punch and took out a 'little bite' on the folded left edge (maybe punching only a 1/4 of the punch then took another 'little bite' out of the right side, top only, this gave my bakers twine a place to stay so it will not move. Who does not need additional Birthday cards?!This front was already stamped and set aside, so I just trimmed it down slightly then layered it over a garden green layer, and used fancy scissors, added a ribbon, then layered it over a black layer then on to a purple card. The tulips are one of my favorite images, a Stampin' Up! retired 2 step stamping set.
Thanks for stopping by!
Monday, October 27, 2014
Once a month I attend a Stampin' Up! workshop at Bobbie's house and we all bring swap cards for each other. Usually my friend Teresa comes to my house and we stamp our cards, 10 all the same so we are ready for the swap.
It is the first thing we do when we all gather at Bobbie's. It is alot of fun to see what each of us created.
Last month I did not have any swap cards ready, so I went into my craft room and looked around the desk top and I 'found' several UFO's (Unfinished objects) I also have a box of stamped images that maybe I stamped at Billie's house and then never used, so I found this one, the white cards stock was larger so I had to cut it down, then I had the background paper on my desk, I found some ribbon and some double stick tape and I was done, one done 9 to go!
I had the base card already stamped with the baby's breath image and the brown embossed wood grain piece, I found the flowers in a basket in my 'box' from Billie's house, It is Stampin' Up! but I do not know the name of the set, I added the bakers twine and more double sticky tape and another swap card was done! 2 down 8 to go!
Stop on by again to see what other cards I swapped last month!
Thanks for stopping by!
It is the first thing we do when we all gather at Bobbie's. It is alot of fun to see what each of us created.
Last month I did not have any swap cards ready, so I went into my craft room and looked around the desk top and I 'found' several UFO's (Unfinished objects) I also have a box of stamped images that maybe I stamped at Billie's house and then never used, so I found this one, the white cards stock was larger so I had to cut it down, then I had the background paper on my desk, I found some ribbon and some double stick tape and I was done, one done 9 to go!
I had the base card already stamped with the baby's breath image and the brown embossed wood grain piece, I found the flowers in a basket in my 'box' from Billie's house, It is Stampin' Up! but I do not know the name of the set, I added the bakers twine and more double sticky tape and another swap card was done! 2 down 8 to go!
Stop on by again to see what other cards I swapped last month!
Thanks for stopping by!
Saturday, October 25, 2014
Saturday, Fall is here in the Pacific Northwest
Fall has arrived I have a few friends who prefer the cold/rain to the sunshine. I prefer the "not rain" so I can have my sunroof open as I drive, I might have the heater on but the sunroof is open. I can handle the rain as I am lucky enough to work inside an office, so just getting from my car to the office is when I experience the rain. I prefer it 'not to be cold' and in our area, Southwest Washington we a have pretty mild weather, not as much rain as Seattle or as much as Portland.
I love to see the trees change colors and like to take drives around the 'country side' to see the landscape. I would like to see the New England States in the fall sometime and I know the trees would be beautiful!
My project this weekend was to make 8 thank you cards for Pastor Appreciation Sunday. I got up at my regular time and planned on going into my craft room and create, however my daughter who has been staying with us was sleeping, so I turned to my 'other' stash of stamping supplies that I keep in the laundry room, so I started with 2 sheets of 8.5 x 11 white card stock and I used sponges to add 3 colors, Blue, Gold and Rust.
When I was done I cut them into 4 pieces 4 x 5.25 each so I had 8 fronts, that could be layered on a regular 1/2 sheet card. Then I used Stampin' Up! retired stamp set Autumn Leaf Prints, and I used black pigment ink and embossed leaves randomly on the quarter sheets. I used a Pearl Embossing powder from Comotion. It changed the black images to more of a silvery color.
Then I decided I needed to emboss the leaves and cut them out so I could add a few to the cards to bring an extra layer. I had some goldenrod card stock and I used pigment ink again in some different colors and embossed them with the same pearl embossing powder, the colors became soft and subtle.
Embossing is a technique that fell in love with and I was so excited when Mom and Dad purchased me the embossing tool. Then somehow I have forgotten to use that technique and it makes the cards look impressive and adds texture and using the Pearl powder it changed the colors.
I decided to use the leaves with the least amount of detail so they would be easier to cut out! I figured I needed at least 2 or maybe 3 leaves per card, that is a bunch to cut out!
Thought I'd show you my stamping area, it started with a few supplies then I needed scissors, and words and more ink and punches and, and, and. So I manage to get my area pretty messed up! This would be my kitchen table!
I layered the card fronts on to the goldenrod cardstock and embossed the words using a green pigment ink and the Pearl embossing powder.
After I put the cut out leaves on I decided I need to add a button, and if I use a button then I like to put string through the holes, so I used embroidery thread.
The Thank you So Much is also a retired stamp set by Stampin' Up! called Greetings 4 You.
I was very much pleased with the results and especially how they are each different with leaf placement and the number of cut out leaves applied. When I was done I had 8 cards and as I addressed each card I realized I only needed 6 cards, so now I have 2 extra to use another time!
Thanks for stopping by, hope you come back soon!
I love to see the trees change colors and like to take drives around the 'country side' to see the landscape. I would like to see the New England States in the fall sometime and I know the trees would be beautiful!
My project this weekend was to make 8 thank you cards for Pastor Appreciation Sunday. I got up at my regular time and planned on going into my craft room and create, however my daughter who has been staying with us was sleeping, so I turned to my 'other' stash of stamping supplies that I keep in the laundry room, so I started with 2 sheets of 8.5 x 11 white card stock and I used sponges to add 3 colors, Blue, Gold and Rust.
When I was done I cut them into 4 pieces 4 x 5.25 each so I had 8 fronts, that could be layered on a regular 1/2 sheet card. Then I used Stampin' Up! retired stamp set Autumn Leaf Prints, and I used black pigment ink and embossed leaves randomly on the quarter sheets. I used a Pearl Embossing powder from Comotion. It changed the black images to more of a silvery color.
Then I decided I needed to emboss the leaves and cut them out so I could add a few to the cards to bring an extra layer. I had some goldenrod card stock and I used pigment ink again in some different colors and embossed them with the same pearl embossing powder, the colors became soft and subtle.
Embossing is a technique that fell in love with and I was so excited when Mom and Dad purchased me the embossing tool. Then somehow I have forgotten to use that technique and it makes the cards look impressive and adds texture and using the Pearl powder it changed the colors.
I decided to use the leaves with the least amount of detail so they would be easier to cut out! I figured I needed at least 2 or maybe 3 leaves per card, that is a bunch to cut out!
Thought I'd show you my stamping area, it started with a few supplies then I needed scissors, and words and more ink and punches and, and, and. So I manage to get my area pretty messed up! This would be my kitchen table!
I layered the card fronts on to the goldenrod cardstock and embossed the words using a green pigment ink and the Pearl embossing powder.
After I put the cut out leaves on I decided I need to add a button, and if I use a button then I like to put string through the holes, so I used embroidery thread.
The Thank you So Much is also a retired stamp set by Stampin' Up! called Greetings 4 You.
I was very much pleased with the results and especially how they are each different with leaf placement and the number of cut out leaves applied. When I was done I had 8 cards and as I addressed each card I realized I only needed 6 cards, so now I have 2 extra to use another time!
Thanks for stopping by, hope you come back soon!
Thursday, October 23, 2014
Thursday, Already!
Time just keeps flying past, and it already Thursday! Over the weekend we down loaded information from our old computer to our new computer and now my photos are all messed up and I can hardly find the photos that I want to post here! I did work on a specific project this weekend, but I had trouble finding the photos, everything is renumbered and mixed up! I hate change!
This is a card I gave to a friend who was having a bad week. The "heart-Note" is a Stampin' Up! image, I think I borrowed it and stamped and embossed several images, then set them aside. One day I was wanting to use the Pop Top (look near the bow) and this is what I came up with. The red background was ink pad directly to the card, then I layered it and kept adding layers of paper, and ribbons and bows. I like the overall design, not much stamping!
Thanks for stopping by for a peek! Hope you come back soon!
This is a card I gave to a friend who was having a bad week. The "heart-Note" is a Stampin' Up! image, I think I borrowed it and stamped and embossed several images, then set them aside. One day I was wanting to use the Pop Top (look near the bow) and this is what I came up with. The red background was ink pad directly to the card, then I layered it and kept adding layers of paper, and ribbons and bows. I like the overall design, not much stamping!
Thanks for stopping by for a peek! Hope you come back soon!
Monday, October 20, 2014
Monday is here, AGAIN
Monday's just keep appearing! I hope you had a GREAT weekend, got lots of stuff done, or maybe just relaxed!
I decided that rather than posting something here everyday I will strive for 3-4 days per week, taking the weekends off. Please check in often to see what I have been up to!
More Walk in the Wild!
Pool Party card stock (122924) was THE color I wanted to use, I had accidentally purchased an extra pack of paper, I also bought the matching Pool party ribbon, so this was the color I started out with, however after designing several cards I did not get a Masculine feel, so I started experimenting with the other color combinations.
I do like the Pool party, and on this card I used more than JUST the moose stamp from Walk in the Wild (130354) I used the Framelits Window Frames (129021) using the smallest die to go around the different animals in this set. Again stamping first then die cutting the image.
On this one I also used the embossing folder Arrows (132187) and I inked the embossing folder before I inserted the paper, I inked both sides of the folder, put my paper in and ran it through the Big Shot (113439) I liked the way this side looked so I used it as the layer on top of the base card.
Putting ink on the embossing folder worked great, the ink just rinsed off with water, and it was ready to be used again. This of course was NOT permanent ink, so it cleaned off easily.
Thanks for stopping by! Have a GREAT Monday!
I decided that rather than posting something here everyday I will strive for 3-4 days per week, taking the weekends off. Please check in often to see what I have been up to!
More Walk in the Wild!
Pool Party card stock (122924) was THE color I wanted to use, I had accidentally purchased an extra pack of paper, I also bought the matching Pool party ribbon, so this was the color I started out with, however after designing several cards I did not get a Masculine feel, so I started experimenting with the other color combinations.
I do like the Pool party, and on this card I used more than JUST the moose stamp from Walk in the Wild (130354) I used the Framelits Window Frames (129021) using the smallest die to go around the different animals in this set. Again stamping first then die cutting the image.
On this one I also used the embossing folder Arrows (132187) and I inked the embossing folder before I inserted the paper, I inked both sides of the folder, put my paper in and ran it through the Big Shot (113439) I liked the way this side looked so I used it as the layer on top of the base card.
Putting ink on the embossing folder worked great, the ink just rinsed off with water, and it was ready to be used again. This of course was NOT permanent ink, so it cleaned off easily.
Thanks for stopping by! Have a GREAT Monday!
Friday, October 17, 2014
Friday is here!
Hello Crafty Friends, I hope you are finding some inspiration in my card ideas. When I decide to use a stamp set, I turn to the internet and put in the name of the stamp, and hundreds of ideas come forth, I scroll through them, and I may pick one to re-create. But then my creativity comes in I might change up the colors, textures, embellishments, back ground papers, so while I start with something I have seen, it always turns into my creation.
Another day of Walk in the Wild, (130354) I must have created 6-8 cards that day changing colors, and design folds.
This is another different fold on the front, I folded the front back 1/2 way and adhered a textured/embossed piece to the front, I used the Arrows embossing folder (132187) I put my sentiment on the inside lower right hand corner, so it shows when the card is closed. I do like the framelits, this one is Window Frames Collection (129021) the sizes fit together is great mats. I usually stamp the image near the center of my paper then place the framelit to capture the part of the design I want to highlight. Rather than using the framelit to cut the shape then trying to stamp the image where I want it.
I was on a 'mission' to create a Masculine card. Which are the harder cards for me to create.
Thanks for stopping by! Have a GREAT Day!
Another day of Walk in the Wild, (130354) I must have created 6-8 cards that day changing colors, and design folds.
This is another different fold on the front, I folded the front back 1/2 way and adhered a textured/embossed piece to the front, I used the Arrows embossing folder (132187) I put my sentiment on the inside lower right hand corner, so it shows when the card is closed. I do like the framelits, this one is Window Frames Collection (129021) the sizes fit together is great mats. I usually stamp the image near the center of my paper then place the framelit to capture the part of the design I want to highlight. Rather than using the framelit to cut the shape then trying to stamp the image where I want it.
I was on a 'mission' to create a Masculine card. Which are the harder cards for me to create.
Thanks for stopping by! Have a GREAT Day!
Subscribe to:
Posts (Atom)